
Android is a pretty slick operating system these days, working equally well on tablets and smartphones, from budget wares to flagship products. But smartphones and tablets aren’t the only thing you can install Android on – how about Android on your laptop? It sounds a little weird, but it’s not only possible, it actually works surprisingly well.
Out of the box, Android is already pretty well suited to being used on a small laptop such as a netbook – it makes good use of meagre computing resources like battery life and memory, comes with a wide array of easy to use apps, and it natively supports mice and keyboards which can be used instead of touch screens. With a specially built version of Android called Android x86, you can install Android on your laptop just as easily as you could install Windows or Linux.
If you’d like to try out Android on your netbook, then it’s a relatively simple affair to do so once you know how. This article walks you through that process, from downloading Android right through to booting into the Android operating system for the first time.
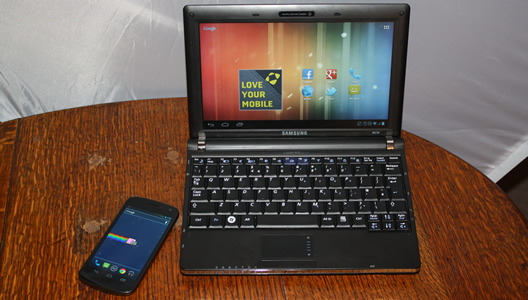
You’ll need a blank USB stick (it needn’t be very capacious, just 128 MB should do), a wireless network connected to the internet and your netbook. I’m using a Samsung NC10, but most netbooks should work — and some laptops may do as well.
Of course, it also bears mentioning that we’re not responsible for messing up your computer and/or life from following these directions – that shouldn’t happen, but the potential is there. Tread carefully.
Let’s get started.
1. Download the Android 4.0 operating system
The first step is to download the modified Android 4.0 operating system from the Android x86 website. You don’t necessarily need to download it onto the computer that you’re installing Android onto, any one will do.

Visit the Android x86 download page here. You’re looking for the section labelled Android 4.0 RC1. There are a few files here; the best bet to start off with for a netbook is the one labelled “Asus Eee PC family.” (If this doesn’t work, the Asus laptop option can also work.) Just download the relevant ISO file to your PC, which should be less than 100 MB in size.
2. Copy the ISO file to your USB drive
As most netbooks don’t have a CD-ROM drive and I haven’t seen a blank CD in a while, it’s best to use a USB drive. There’s a great tool called UNetbootin which will copy the ISO file to your USB drive and make it bootable: exactly what we need. Download the UNetbootin program here, and you’ll see the screen below.

Click on the button with three dots on the right hand side of the window and select the ISO file you downloaded in step 1. Next, select the USB drive from the dropdown menu labelled “Drive:” at the bottom of the window. When you’re confident you’ve got the right drive, hit OK to begin the operation. You will be asked to wipe the USB drive before you begin, so make sure you haven’t gotten anything valuable on there!
A window will pop up once you hit OK for a short time, and once the operation is complete you’ll be asked if you want to restart your PC. Click “No”, and then safely remove the USB drive from your system.
3. Boot your netbook from the prepared USB drive
Now you just need to boot your netbook from the USB drive prepared in step 2. Typically this will involve turning on your netbook, then entering the BIOS by pressing a key on the keyboard. If you’re not sure which key and you don’t see one specified when you start your PC, just Google for the name of your netbook followed by “BIOS key” and you should find it. Alternatively, turn your laptop on and keep an eye on the top and bottom left corners of the screen for a message akin to “Press F2 for setup”. Once you know the key, reboot your laptop and get ready to tap it when prompted.
Once you’ve booted into the USB drive, you should see a blue screen similar to the one below. This menu will let you choose between running Android without installation and installing Android to your hard drive.
If you choose “Live CD – Run Android without installation”, you’ll boot directly into Android. This is a great thing to do at this stage, just to make sure your mouse, keyboard, wireless and display all work properly.
If you do this and everything works, just turn off the netbook and get to this menu again, then choose “Installation – Install Android to hard disk.”

If you face any problems, like one of the components listed above not working, then your netbook may not be compatible with Android x86. You can try downloading a new version of Android x86 from the download page in step 1 to see if this helps, but unfortunately the software won’t work for every laptop and netbook out there.
For now, we’ll assume you’re happy and able to proceed to installation.
4. Install Android
Now you’ll have to choose which drive to install Android to. Any NTFS (Windows) or EXT2 / EXT3 (Linux) drives should work. If you like, you can format the partition when prompted, but you can also proceed without doing so – if Windows is on that drive, then you’ll be able to choose between Android and Windows when you start your PC.
Once you’ve chosen a drive, you’re asked if you’d like to make a directory read/write – choose “Yes” here. You’re also asked for the size of your Android installation; choose the maximum of 2047 MB. This operation will take a while, but once it completes you may boot into Android. You also have the chance to create a virtual SD card of the same size (2047 MB) at this time, but you can skip this if you wish as it’s not entirely necessary.

Now Android should be installed. You’ll be asked to reboot; be sure to remove the USB drive once the netbook has turned off.
5. Boot into Android
You should now reach the Android boot menu, powered by GRUB. You’re free to choose any Windows installations that were found or Android. Choose the first entry to boot into Android.
After some flashing white text and a pulsing Android logo, you’re finally there: Android. You’re asked to choose an installation language and date, and then connect to a wireless network in order to sign in with your Google account. Of course, you can create a Google account at this stage too if you don’t have one or want a fresh one.

Once this brief period has ended, you’re into Android proper! If everything works and nothing crashes when you click on it, then you’re done. Congratulations!
Got any questions about the installation? Let us know via Twitter (@Gadget_Helpline) or our Official Facebook group and we’ll surely help if we can. If you’ve succeeded, then let us know that too!Thanks for reading and farewell for now.
Vital Links:
Android X86: http://www.android-x86.org/download
UNetbootin: http://unetbootin.sourceforge.net/
This article was written by William Judd. William writes for Mobile Fun, the UK’s leading online retailer of Sony Xperia S cases, iPad 3 screen protectors and iPad 3 cases.